Custom Emails
Learn how to send your own emails for user lifecycle events.
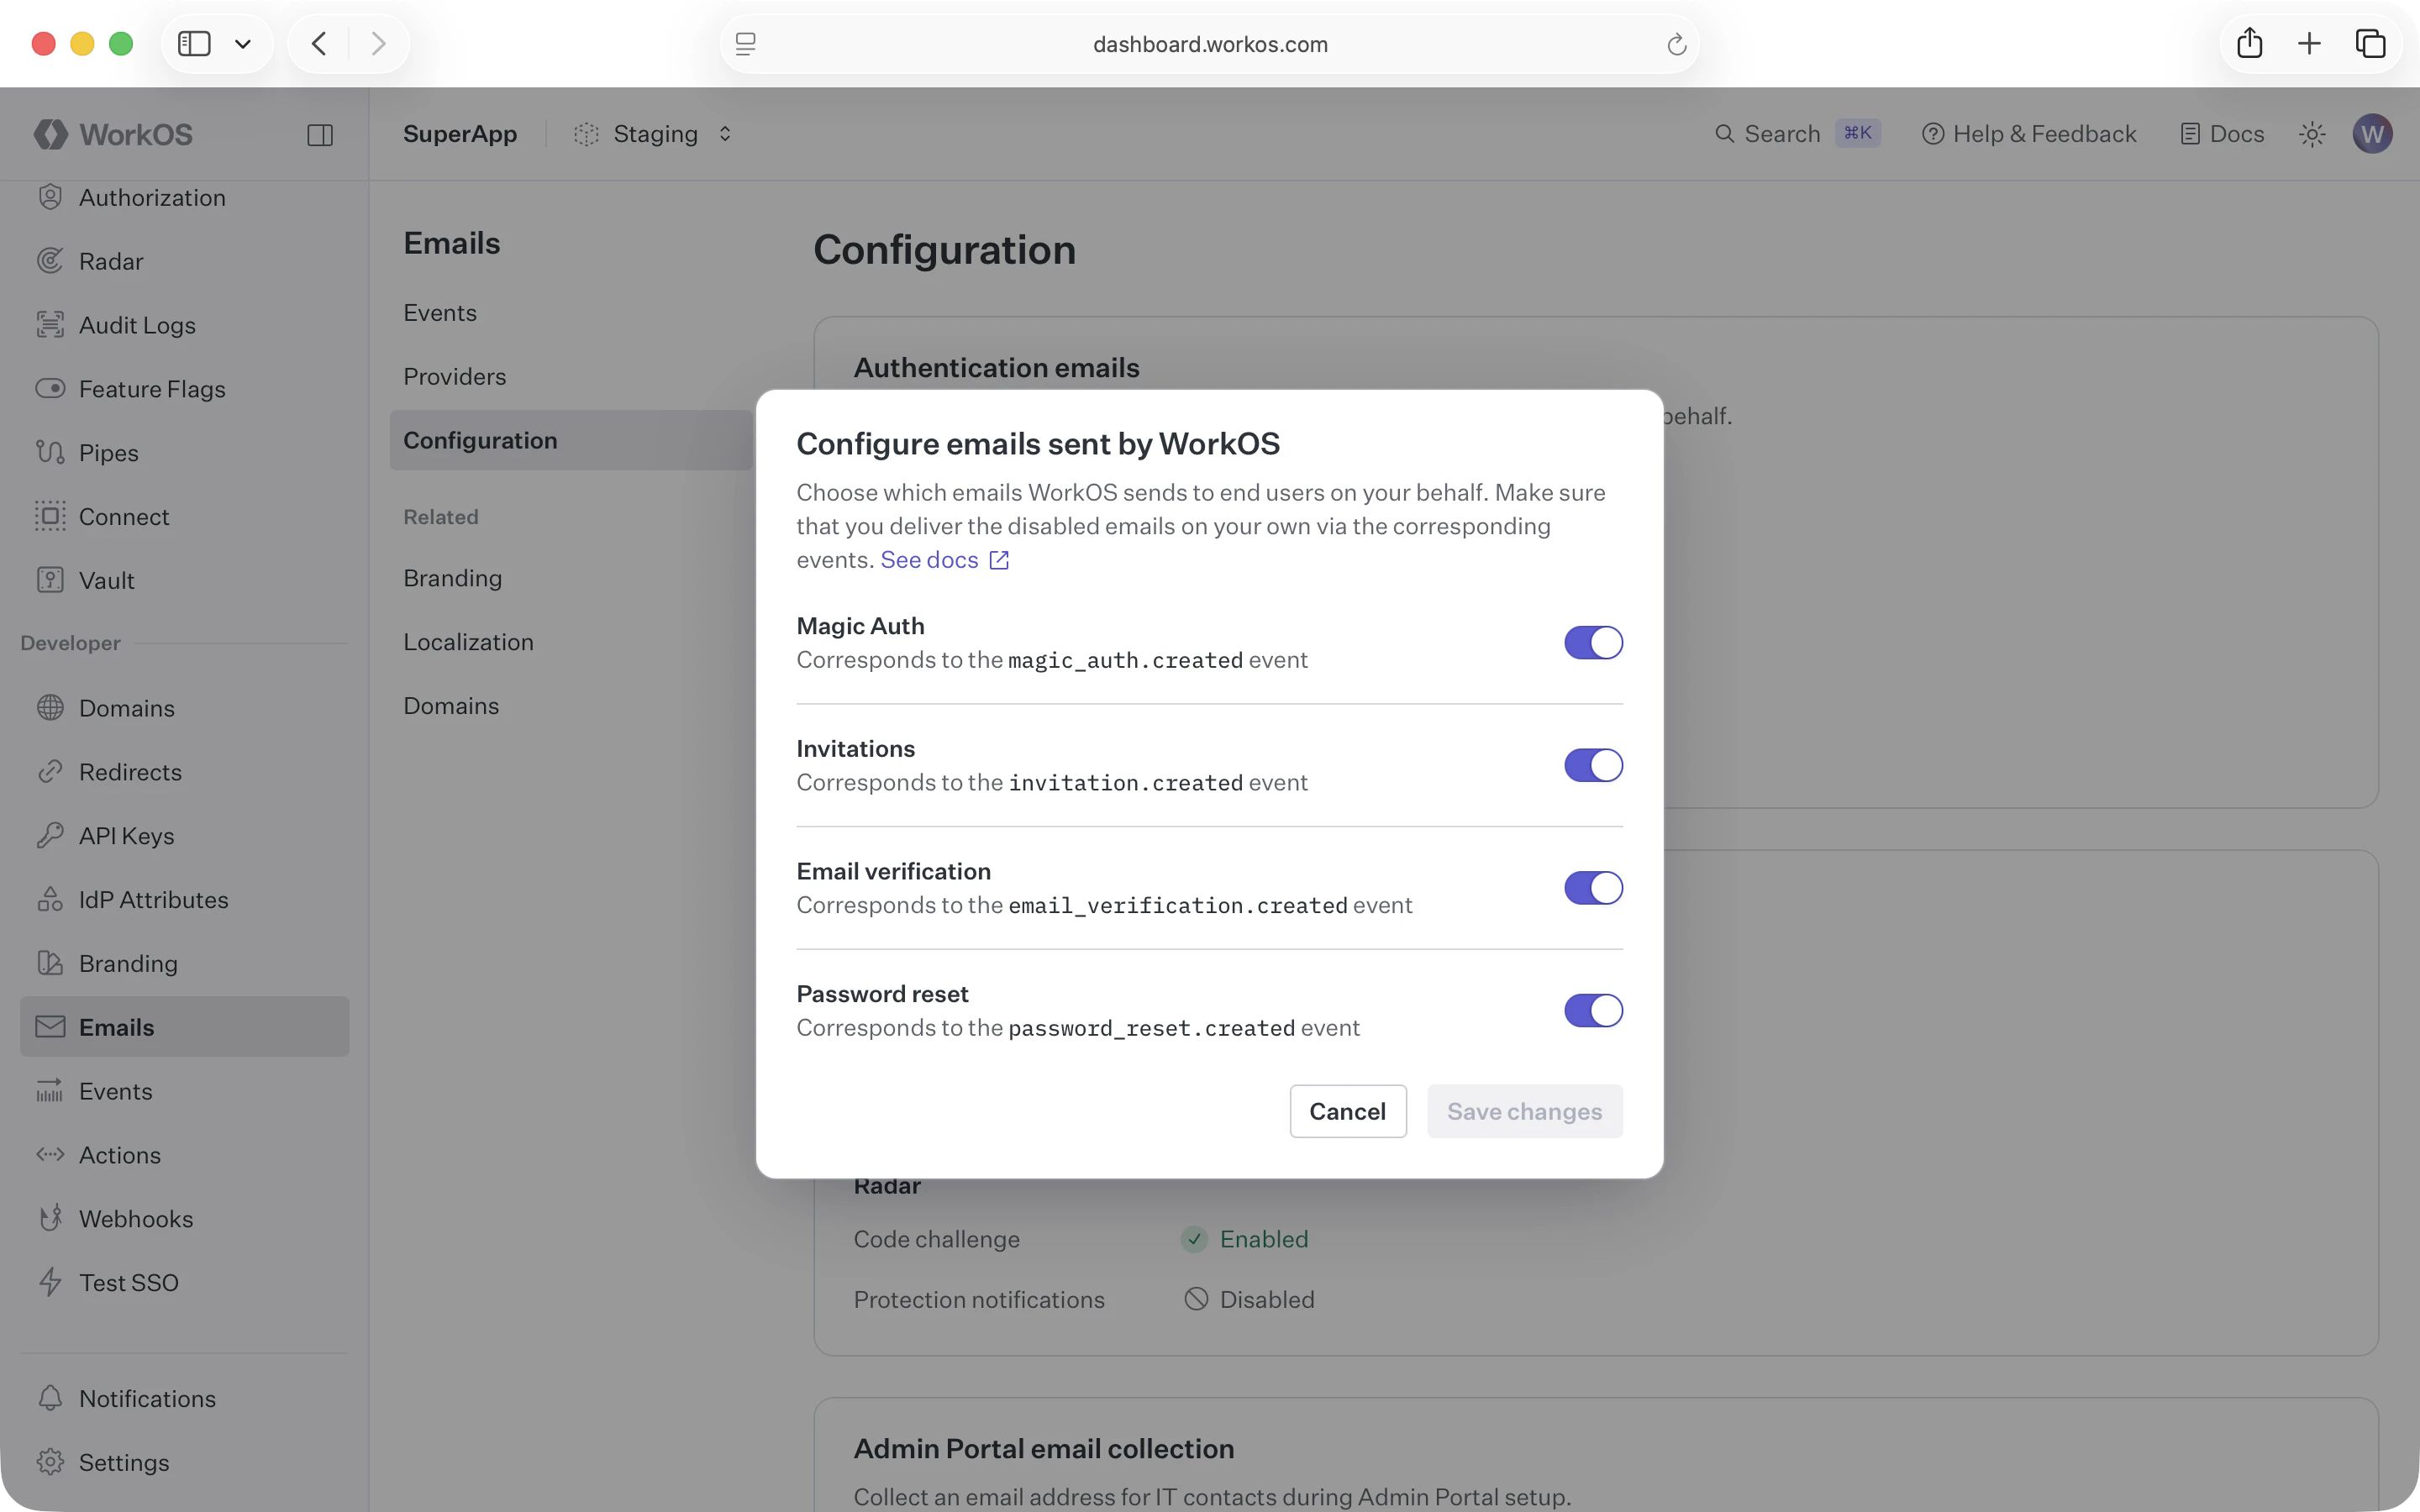
By default, WorkOS will send emails related to AuthKit for you, such as password reset and Magic Auth. If you’d like to customize email content or have more control over deliverability, you can turn off the default emails and deliver your own emails using the WorkOS API.
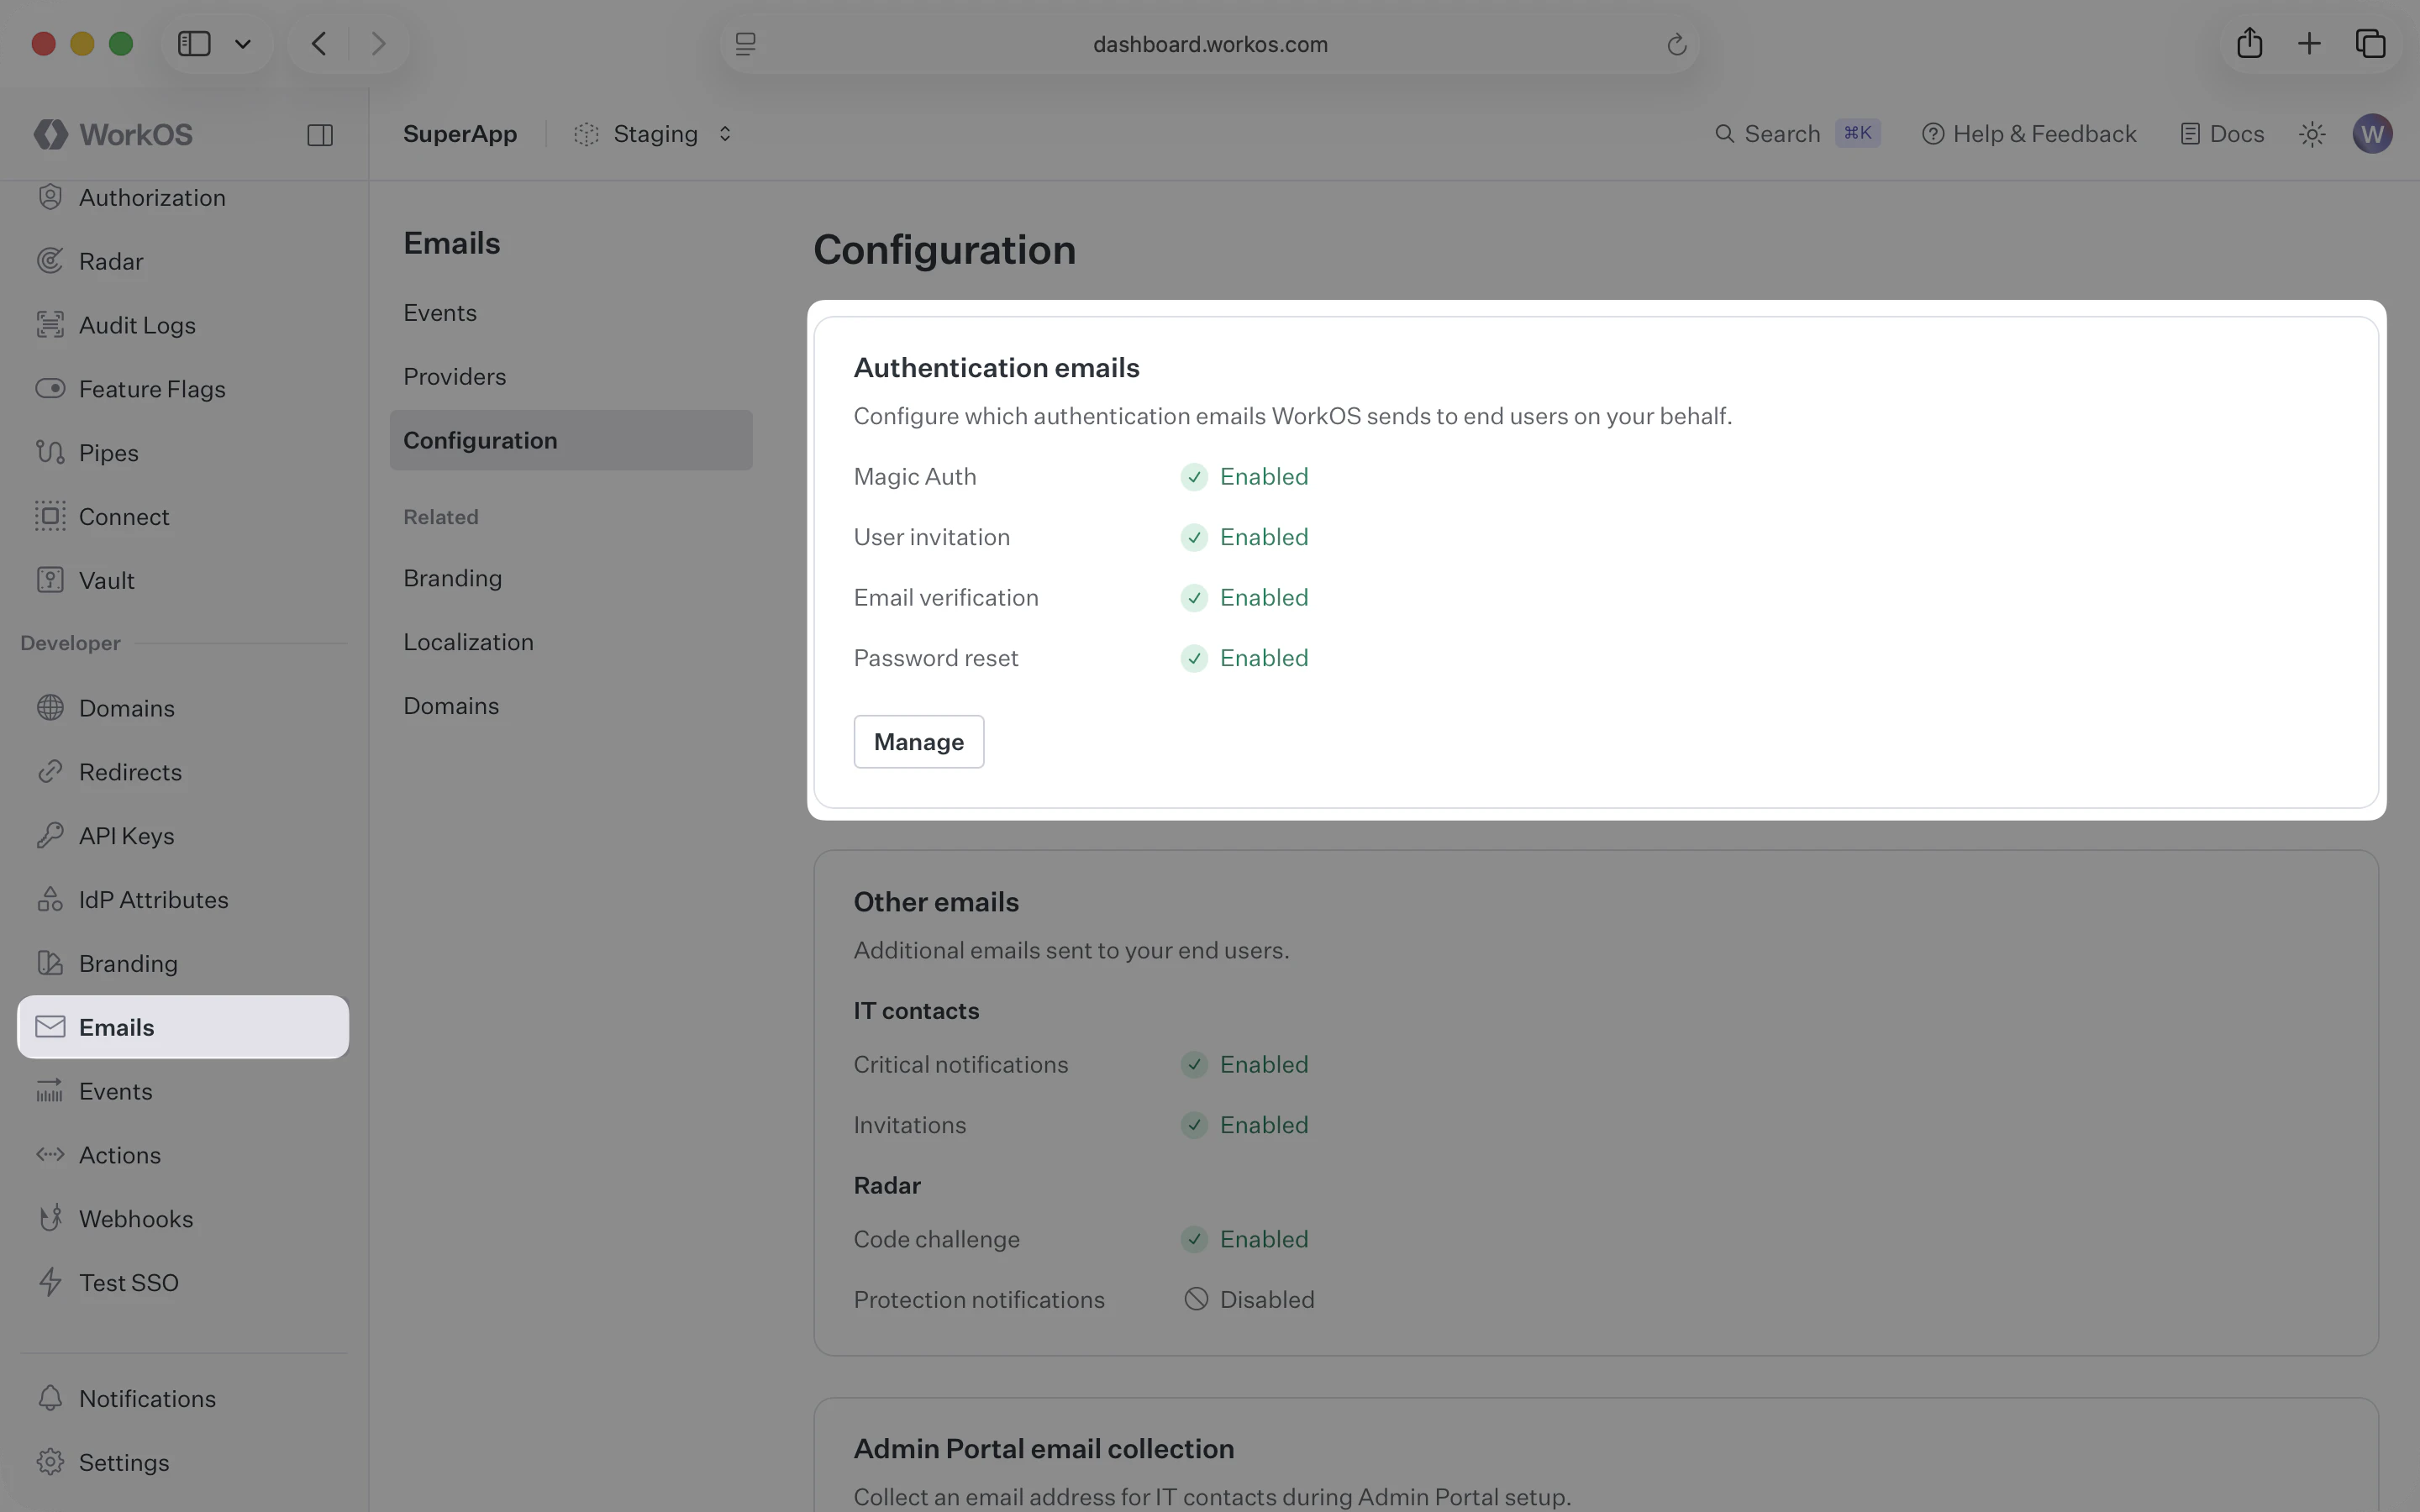
To change email settings for an environment, navigate to Emails → Configuration and select Manage. You should have an Admin role to update this setting.
Once you’ve turned off the default user invitation emails, use the information below to send custom invitation emails.
- invitation.created
- Event emitted when an invitation is created, which can be consumed using the events API or webhooks.
- Get Invitation API
- Used to retrieve the invitation object from the ID in the invitation created event.
- Send Invitation API
- Used to create an invitation via the API without handling the invitation created event.
Set up your user invitation URL
Make sure you have the correct user invitation URL set by navigating to Applications → your application → Redirects in the dashboard. The default setting is the AuthKit URL for accepting invitations. If you are using your own authentication UI, make sure the URL path is configured on your end to capture the invitation_token query parameter, and pass it into one of the authenticate methods.

AHandle manually creating invitations
If you’re creating invitations using the WorkOS dashboard, you’ll need to handle invitation.created events using the events API or webhooks.
Due to security concerns, the events do not contain the sensitive information you’ll need to send the email. To retrieve the full invitation object with this information, use the invitation ID from the event to call the Get Invitation API.
You can skip this step if you don’t plan to create the invitations manually in the dashboard.
BHandle invitations created via the API
If you’re creating invites via the Send Invitation API, you can send your own email using the information returned in the invitation object.
If you also plan to create invitations manually in the dashboard, you can just handle invitation.created events as described above.
Send your email
The recipient of the email should match the email attribute in the invitation object retrieved via the API. The body of the email should include a link where the user can accept the invitation. For most use cases, you can use the accept_invitation_url as this link.
If you are building your own authentication app, and your invitation acceptance path diverges from this pattern, you may want to construct your own URL with the token, rather than using the accept_invitation_url.
Additionally, if the invitation object contains an organization ID and/or an inviter user ID, you may want to include that information in the body of the email.
Once you’ve turned off the default Magic Auth emails, use the information below to send custom Magic Auth emails.
- magic_auth.created
- Event emitted when a user initiates a Magic Auth authentication, which can be consumed using the events API or webhooks.
- Get Magic Auth API
- Used to retrieve the Magic Auth object from the ID in the Magic Auth created event.
- Create Magic Auth API
- Used to create a Magic Auth code via the API without handling the Magic Auth created event.
AHandle Magic Auth codes created via AuthKit
If you are using AuthKit, you’ll need to handle magic_auth.created events, using the events API or webhooks.
Due to security concerns, the events do not contain the sensitive information you’ll need to send the email. To retrieve the full Magic Auth object with this information, use the Magic Auth ID from the event to call the Get Magic Auth API.
You can skip this step if you’re building your own authentication app.
BHandle Magic Auth codes created via the API
If you’re initiating Magic Auth authentication via the Create Magic Auth API, you can send your own email using the information returned in the Magic Auth object.
Send your email
The recipient of the email should match the email attribute for the Magic Auth object retrieved via the API, and the email should include the code. Recipients will input that code into AuthKit, or your own authentication UI, to authenticate into your application via Magic Auth.
Once you’ve turned off the default email verification emails, use the information below to send custom email verification emails.
- email_verification.created
- Event emitted when a user requires email verification, which can be consumed using the events API or webhooks.
- Get Email Verification API
- Used to retrieve the email verification object from the ID in the email verification created event.
- Email Verification Required error
- Returned in the API when attempting to authenticate a user that requires email verification.
AHandle email verification codes created via AuthKit
If you are using AuthKit, you’ll need to handle email_verification.created events, using the events API or webhooks.
Due to security concerns, the events do not contain the sensitive information you’ll need to send the email. To retrieve the full email verification object with this information, use the email verification ID from the event to call the Get Email Verification API.
You can skip this step if you’re building your own authentication app.
BHandle email verification codes created via the API
If you are using the authentication API, an email_verification_required error will be returned if the user you’re authenticating needs to verify their email. This error contains an email_verification_id that can be used to call the Get Email Verification API endpoint which returns the email verification object that contains the information needed to send the email.
Send your email
The recipient of the email should match the email attribute for the email verification object retrieved via the API, and the email should include the code. Recipients will input that code into AuthKit, or your own authentication UI, to verify their email.
Once you’ve turned off the default password reset emails, use the information below to send custom password reset emails.
- password_reset.created
- Event emitted when a user requests to reset their password, which can be consumed using the events API or webhooks.
- Get Password Reset API
- Used to retrieve the password reset object from the ID in the password reset created event.
- Create Password Reset API
- Used to create a password reset object via the API without handling the password reset created event.
Set up your password reset URL
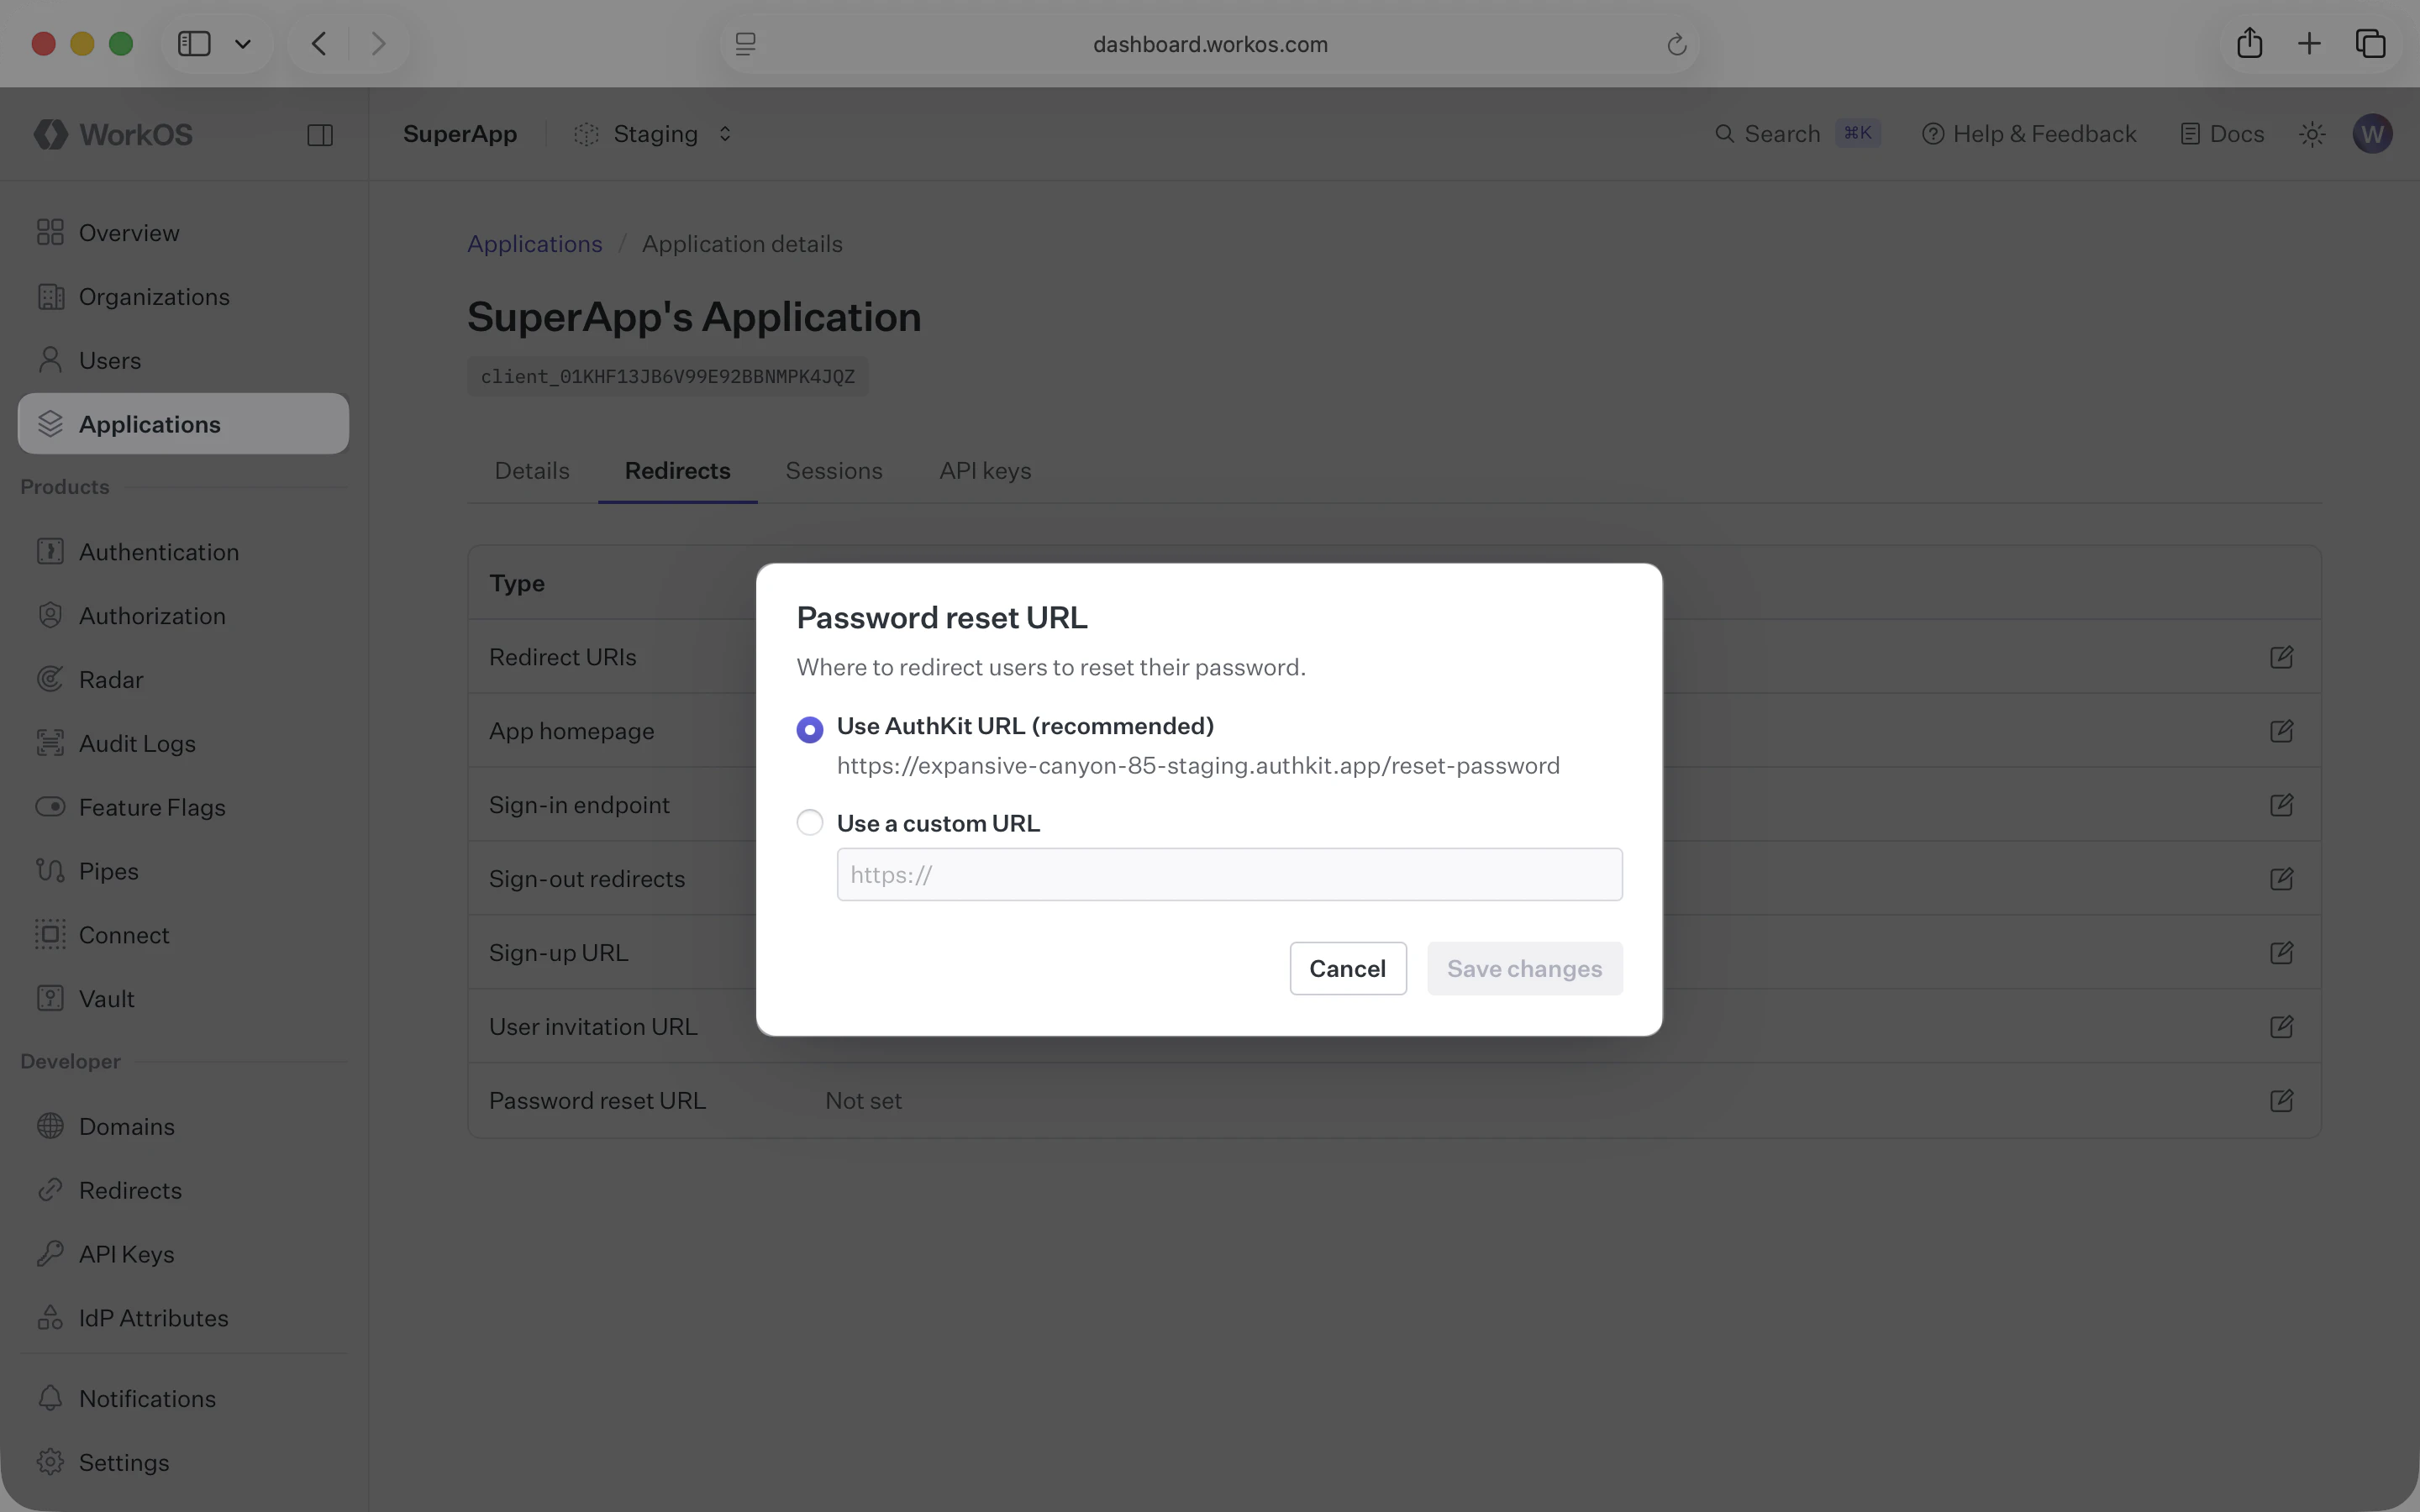
Make sure you have the correct password reset URL set by navigating to Applications → your application → Redirects in the dashboard. The default setting is the AuthKit URL for resetting passwords. If you are using your own authentication UI, make sure the URL path is configured on your end to capture the token query parameter, and use it to reset the password.
AHandle password resets created via AuthKit
If you are using AuthKit, you’ll need to handle password_reset.created events, using the events API or webhooks.
Due to security concerns, the events do not contain the sensitive information you’ll need to send the email. To retrieve the full password reset object with this information, use the password reset ID from the event to call the Get Password Reset API.
You can skip this step if you’re building your own authentication app.
BHandle password resets created via the API
If you’re creating password resets via the Create Password Reset API, you can send your own email using the information returned in the password reset object.
Send your email
The recipient of the email should be the email attribute in the password reset object retrieved via the API. The body of the email should include a link where the user can reset their password. For most use cases, you can use the password_reset_url as this link.
If you’re building your own authentication app, and your password reset path diverges from this pattern, you may want to construct your own URL with the password_reset_token, rather than using the password_reset_url.